Showing posts with label Office. Show all posts

Thursday, November 5, 2009

Rethinking My Bookshelves

As much as I like the look of books arranged by color, this images has me seriously rethinking my approach to bookshelves...

I would love to have a colorful library just like this.


Image via See Saw Designs.

Friday, October 9, 2009

Lacquer Boxes

About a year ago, I was super inspired by this image of lacquer boxes in bold colors with sharp black borders.


The price tag was in the hundreds for these boxes though (I think from Vivre or Plantation Home?), so I went the DIY route with some basic wood pieces from IKEA.

I gave them all of the boxes two coats of turquoise craft paint.


Then I taped off the edges and painted in the black borders.


Then I spray painted everything with lacquer (though, if I was doing it now I would use my favorite Wipe-On Poly in gloss).


I don't think I'm tricking any visitors into thinking that I spent hundreds of dollars on these boxes in my office, but I like them!

Thursday, October 1, 2009

The Office

I painted the 500 lb credenza over the weekend, which spurred the official decorating of my office. By Monday night the last coat of poly had cured and we brought the furniture inside. Tuesday morning I headed down to my basement to go 'shopping' for my sorely neglected office, a long and narrow room off our living room. Seriously, the office was a mess - boxes still everywhere.

The dreaded Before shot. The contents of my desk were all over the floor while my desk was getting a face lift.

Here's how I put the room together with almost no money:

1. Revamped Parsons Desk

I bought a vintage Parsons desk on Craigslist a year or two ago for almost nothing. This is after I sanded it.


I had painted it a fun green color, but now I wanted a sort of dingy pale aqua color, similar to Martha Stewart for Valspar "Vintage Map." Since the desk is pretty small, I decided to save money on paint and mixed my own color using some glossy white latex and a little bit of turquoise and brown acrylic craft paint.


I rolled on the paint with a mini-roller and did about three coats. After letting the last coat dry overnight, I used my favorite product - Wipe On Poly. Yes, it's as easy and awesome as it sounds. Polyurethane sealer that you wipe on.

Action shots!!


Two good coats of Wipe-on in "Gloss" and 24 hours of curing time and the Parsons desk looked as good as new.


2. DIY Fabric Shade

I used about a yard and a half of linen from my stash and a roll of 1.5" red grosgrain to make a fabric shade for the window. It still needs to be lined, but it's not bad for a $0 project. Here are the instructions for making your own.


3. New (old) RED Credenza.


After reading this post from Nick Olsen a while back, I picked up a couple cans of Rustoleum's 'Saftey Red' Spray Enamel at Home Depot for a client's project. We ended up going with a different color scheme, but I kept the spray paint. And I'm so glad I was able to use it on this project! Isn't it a fun color? The perfect orange-red.


Since I know you will ask -- I did prime the credenza first. Well. Part of the credenza - just the top since that's the part that gets the most wear.


I rolled on my trusty Zinsser and let it dry while I worked some magic on the dingy brass hardware with white vinegar and salt.


The credenza ended up needing two or three coats of the spray enamel. Because I invested $2.95 in this reusable spray painting nozzle/trigger/thing, my pointer finger and I are still on speaking terms. AND the paint job looks professionally sprayed.

The freshly painted credenza got two coats of Wipe-On Poly as well and it was done. I love the way the cleaned up brass hardware looks against the orangey red!


4. Pretty Inspiration Boards

I picked up a pair of very cheap cork boards and painted the frames with that same yellow paint that I used in my girls room (Martha Stewart "Olive Oil"). No need to tape or to be careful with the paint job here since the cork will be covered up.


I measured and cut up some old fabric that I bought for a project and never used (--Are you picking up on a theme here??) and simply ran a line of fabric glue around the border of the cork board. I glued one edge at a time and smoothed like crazy so that the fabric would lay perfectly flat. (PS the fabric is an outdoor print made by Waverly, called "Lovely Lattice" in Lagoon)


Then I fabric glued on some red gimp/trim to cover any imperfections or gaps in the border.


I hung up the refinished cork boards about five minutes before taking pictures, so I haven't had a chance to really style them yet with inspiration stuff, but that can be a fun ongoing project.


The rest of the room was put together with stuff I already had. An IKEA rug, an eBay lamp, some prints from a vintage shop, etc.


And that's it for my (basically) $0 office redo! I've got some sort of cold/flu situation happening, so I think I'm going to call it weekend. See you back here Monday?

xoxo, Jenny

Wednesday, September 30, 2009

Sneak Peek: Office

My office went from nothing to something special in about 5 hours yesterday. Total dollars spent = $45, and 40 of that was for this behemoth...


I have to run off now to a furniture auction I just heard about called Dixon's in Crumpton, MD. It's supposed to be amazing. But please come back tomorrow for the full recap on my office face lift...

Wednesday, September 23, 2009

Hardware Obsession

I completely fell in love with this credenza posted a few weeks ago on Design*Sponge. I love the blue painted finish, but I really LOVE the amazing brass hardware. The image was filed away in my brain for future reference...


Every Tuesday and Friday here in Dover, there is a flea market called Spence's. It's a lot of junk - plastic knock off handbags and shady toiletries aplenty - but there is a healthy vintage/antiques section. Every time I go to Spence's I've picked up one or two fun knick-knacks for around a buck each. Then we hit up the Amish food market for beautiful fresh produce and out-of-this-world baked goods. It's been a fun weekly thing for our family.

Most of the flea market area is full of smaller stuff, but there is a tiny furniture section that's never really tempted me before. Today though, I spied this guy under a pile of old table linens...
Hmm. Looks very familiar...


$40 later and he was mine.


So exciting, right? A couple coats of glossy oil-based paint and a little Bar Keeper's Friend on the hardware will do wonders here. The plan is to put it in my office to hide my fax machine and giant printer/scanner. Can't wait to show you the 'after' pictures!

Thursday, June 25, 2009

Finding a Niche for a Home Office

Apartment Therapy
I am always so impressed the way designers and architects find small niches for home offices. In my own home , we have a dedicated office space, but my husband often works from home and so it is "his"office. That left me trying to carve out a niche for myself in some other area of the house.
Here are some of my favorite ideas for fitting in an office when space is tight.
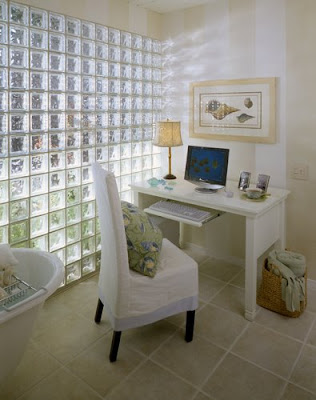
Brian Vanden Brink
A quaint space, but look closer and you will see this office is in the bathroom. Not sure how the moisture will effect the computer, but in homes with large baths this is a creative alternative.

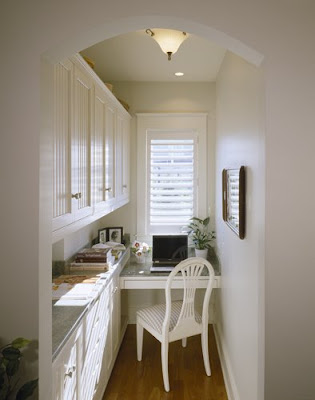
Hutker Architects
Have a small area in your hallway? Here is wonderful little space that has been efficiently utilized.

Domenic Mercadante
Here is an office created in the far part of a butler's pantry. Spaces doing double duty!

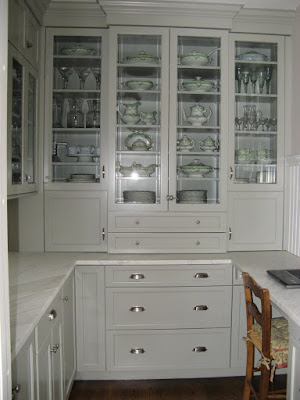
Willow Decor
Here is where I ended up! I carved out a niche office for myself when I created my Butler's Pantry. It does double duty as a functional pantry, housing appliances, serving pieces and dishes, as well as cabinets to hold internet wiring, printer and family files. Read all about it here.
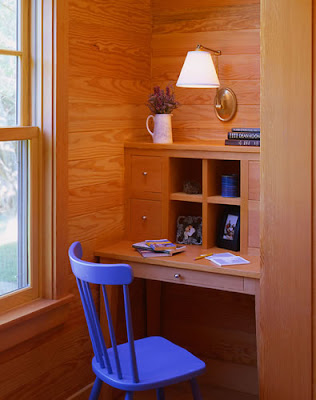
Apartment Therapy
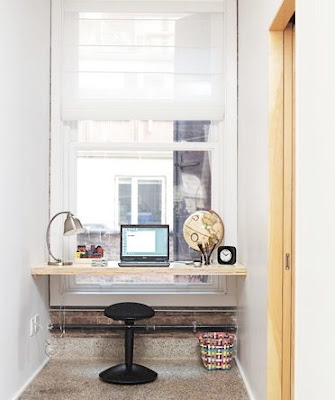
Is this a closet with a window, an entry or landing? This is one of my all time favorites. I love the the shelf desk and the wonderful natural light.
Centerbrook Architects
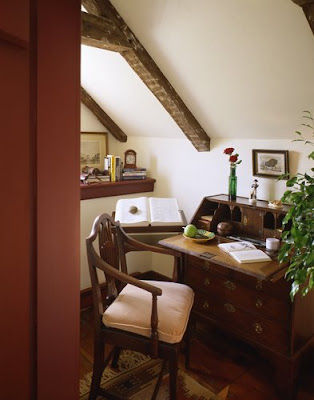
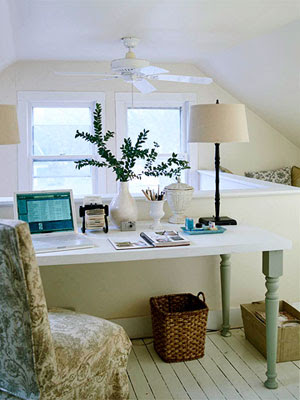
An attic alcove has just enough space for a small desk and chair.
Anthony DiGregario Architects
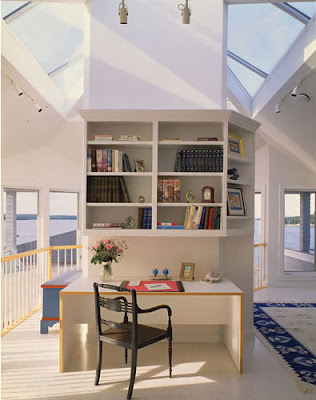
Here is an unusual space at the top of a landing. The owner added built ins for a very efficient space -notice how they wrap around to the right.
. Tittman Architects
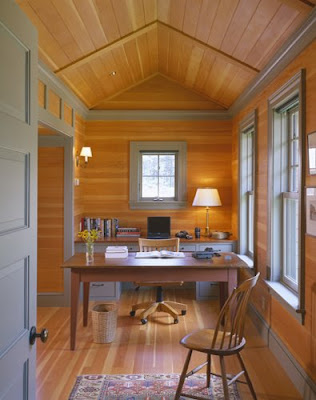
This area is not quite as small as some of the others but I included it because it is a space used by two people or one that does double duty. Notice the desk behind the table. Perhaps a shared space or the table is used for crafting.


Better Homes and Gardens
Another small area at the top of a landing or part of a small bonus/loft room.


Country Living
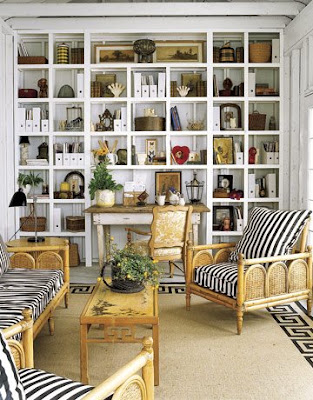
Although this office area is not in a small room; it is in a small space. Interestingly the desk is tucked into the bookcase design, taking very little space up in the room. Very creative!


Restyled Home
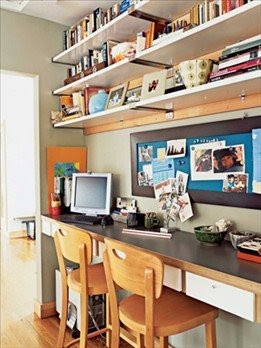
Here is a desk area tucked into a pass thru hallway. I like the vertical use of space in this area. The two chairs are also very functional for a parent to sit and help with homework.


This Old House
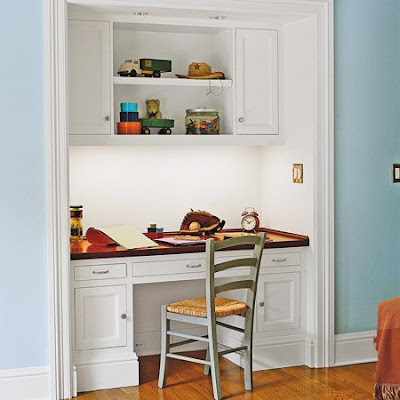
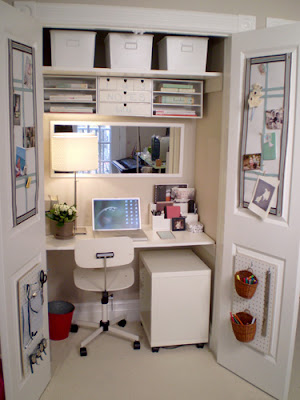
Of course a well designed closet space can be turned into a wonderful office. Take off the doors and viola - home office!


Steve & Chris
Or leave the doors on and close them if things get too messy. I really like the bulletin and peg boards on the doors for storage and notes.

Apartment Therapy
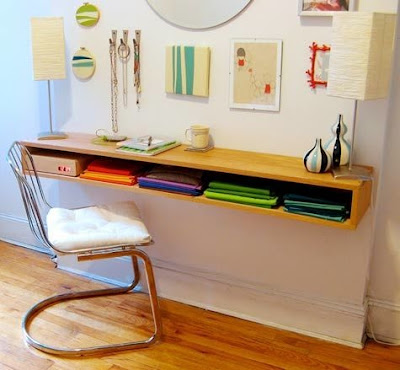
This is a wonderful modern example of how any space can be turned into an office.


Let me know how you have used an unusual area in your home as an office!

Monday, May 18, 2009

Making a Functional and Beautiful Office/Guest Room

For the foreseeable future I know we won't be living in a home with two separate guest room and office spaces. In fact, when we're living in Manhattan we'd be lucky to have enough space for any sort of combined guest room and office!

I have always loved the warm and sunny, yet somehow neutral, colors of this guest room/office that was featured in a Sept 2004 issue of MS Living.


Looking beyond the great colors, the functionality of this room is pretty awesome. There are some really great ideas that I am definitely saving for later:

1. Removing the closet doors to create a desk space is an old trick, but adding curtains makes the desk space look less like a transformed closet and more like a custom nook.

These sheers from Pine Cone Hill are very similar to the featured curtains. It would also be really easy to whip up your own version with a pair of cheap IKEA sheers (you could tea-stain or dye them to get a similar color) and a few yards of ball trim. Looks like the Martha team put two rows of trim here in the inspiration room, which is a great, full look.


2. I love the thick shelves in the desk nook. Does anyone have an idea how to achieve this look without paying a carpenter to do it? Maybe doubling up some MDF and then caulking the seam?

3. Putting a nice table lamp on the desk really steps it up. Ebay is my favorite place to look for quality vintage lamps. I've noticed that pairs can be pricey, but single lamps are usually a steal. Don't forget to check out your local thrift stores for great lamps, too, just make sure to add a clean, new shade.


4. Hide all the office supplies and other junk in coordinating, labeled boxes. IKEA's are fine, but the Container Store's boxes are my favorite.


4. I think the best idea from this photo is to install double glass doors. The glass really opens up the small space, provides more light and helps the room to feel more like an office. If you added some DIY shades to the door windows, there would be plenty of privacy for your guests.


Do you combine your guest room and office spaces? What do you find works for you?